![[spacer]](../../../gifs/c_blank.gif)
  |
DreamDesign
Digital Graphics Tutorials
Main Index
Home-Brew Text
Effects
|
![[spacer]](../../../gifs/c_blank.gif)
Looking for an expensive 3D program in order to make impressive reflective
metallic lettering? No need -- even a minimal program like Windows Paintbrush
can reproduce the techniques given here.
|
 |
![[spacer]](../../../gifs/c_blank.gif) |
![[spacer]](../../../gifs/c_blank.gif) |
![[spacer]](../../../gifs/c_blank.gif) |
|
Step
1:
A chromed appearance isn't so difficult;
it only looks that way. The first thing you'll need is a slightly-messy gradient
running A-B-A-B (dark to light, dark to light) with an abrupt edge between
the central B-A section. I'm supplying one here to help demonstrate what
I'm referring to. One version is in grays (to simulate silver/chrome), the
other in golds (for simulating brass or gold). Feel free to copy these gradients
to help you make your own, but keep in mind that these are compressed JPG
and therefore not as smooth as what you'll prefer to work with.


A basic effect such as Motion Blur
or Wind can be used to add the minimal streaks to the gradient, but take
care that the streaking only goes from dark to light, not light into dark.
When your gradient is prepared, save it to your storage area. You'll use
and re-use it many times.
|
Step
2:
Now prepare two copies of your chosen
text. I like adding a simple border around the text; you may or may not care
to do that, but experiment and find out what you prefer. We're going to call
one copy of the text the "back" and the other copy the "lettering."
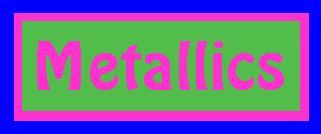 Prepare the "back"
copy by filling the letters and border with a wild color, like hot pink,
and the inner back portion with something mild like green as shown here.
Your actual working background area should be filled with a solid tone unlike
the others, such as the blue I'm using. Prepare the "back"
copy by filling the letters and border with a wild color, like hot pink,
and the inner back portion with something mild like green as shown here.
Your actual working background area should be filled with a solid tone unlike
the others, such as the blue I'm using.
 Prepare the "lettering"
copy by filling the characters and border with the mild green, then adding
a tight shadow in black and a highlight in white. It already looks kinda
cool, doesn't it? Prepare the "lettering"
copy by filling the characters and border with the mild green, then adding
a tight shadow in black and a highlight in white. It already looks kinda
cool, doesn't it?
|
Step
3:
Open a new window the same size
(or slightly larger) as these others and paste in a copy of your metallic
gradient, re-sizing as needed. Make a duplicate of this window so that two
copies of your gradient are waiting for you.
|
 Step
4: Step
4:
Set your background (transparent)
color to the mild green and paste your "lettering" copy over the metallic
gradient. There are many uses for it already, just like this!
|
 Step
5: Step
5:
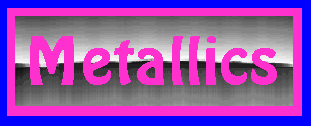
Now paste the "back" copy over your
second gradient window. Adjust this alignment slightly so that the harsh
light/dark division of the gradient will fall slightly lower on the image
than it did on your "lettering" copy.
|
 Step
6: Step
6:
Reset your background (transparent)
color to the wild hot pink. Copy your "back" version and paste it over the
"lettering" copy. Take care to align the letters and border so that everything
fits together smoothly...and voila! There is your finished result, created
"by hand"!
|
|
|
|
 |
|
|
![[colored rule]](../../../gifs/c_violet.gif) |
|
|
Varian's
Dreamview: DreamDesign is a portion of Varian's Dreamcatcher and
is Copyright ©2004 by Varian.
All rights are reserved.
None of this material
is to be redistributed on the Web or in any other form without prior consultation
with and permission from the author. Exceptions to this statement, granting
additional limited rights for particular selected elements, are noted and
detailed in context with those particular elements.
|
Decorating
the WorldWide Web
since 1995.
|
|
|
![[spacer]](../../../gifs/c_blank.gif) |
![]()