| 1 - Open a New file in Vue d'Esprit
and select any atmosphere.
2 - Move to Layer 2. Right-click
on the Terrain icon. Uncheck the fractal options if necessary. You can set
the size for 256x256 here, or use the increase size option on the next
screen.
3 - Upon reaching the terrain screen,
you should have a blank area to start with, set to a size of 256x256.
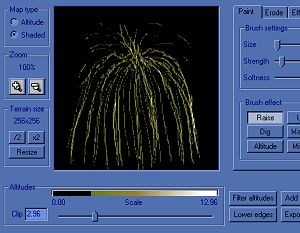
4 - Set the Raise tool to a small
diameter, a size that will be easy for you to work with (which will depend
on your particular project). Now think of the shape you want your spray to
have -- consider how it would look in 2D, flat.
5 - Draw the basic lines of flow
that you want the water to take. Sprays begin in a central spot, then flare
outward. Remember gravity -- the flaring distance will be restricted
by gravity. Judge it visually.
6 - Trace over the same lines of
flow 3-4 times. It's not important to trace the lines precisely; in fact,
you want to vary the spacing a little. Take care, however, not to widen the
lines too far. You just want to add some variance to them.

7 - When you're satisfied with the
drawing, use Diffuse once or twice, then raise the Clip level to remove all
unused portions of the terrain square and return to the main Vue
screens.
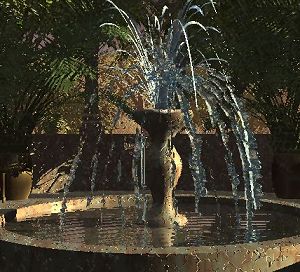
8 - Now set your "spray" object
into place (keeping the flat portion directed away from the camera). Apply
a water material to it. Add a couple more objects and render your spraying
water.

9- Extra tip:
The example shown here also utilizes a modified Carex plant at the very top
of the fountain. The Carex material was given water Colors, increased Reflection
and an irregular Bump. (Don't change its Transparency settings.) Although
not really needed in this example, the Carex plant (being an ideal fountain-type
of shape) can be helpful in visually establishing a 3D fountain form if the
camera angle is a little different from this straight-on view. Or try a Carex
alone as a raindrop splash on a wet sidewalk!
|

