| 1 - Open a New file in Vue d'Esprit
and select any atmosphere.
2 - Move to Layer 2. Right-click
on the Terrain icon. Uncheck the fractal options if necessary. You can set
the size for 256x256 here, or use the increase size option on the next
screen.
3 - Upon reaching the terrain screen,
you should have a blank area to start with, set to a size of 256x256.
4 - Set the Raise tool to a smallish
diameter, a size that will be easy for you to work with (which will depend
on your particular project).
5 - Draw the basic line of flow
that you want the water to take. Keep in mind that one side of this (the
"bottom" of the terrain) will be flat, so choose your perspective using the
direction you'll want for your camera angle.
6 - Trace over the same line of
flow 3-4 times. It's not important to trace the line precisely; in fact,
you want to vary the spacing a little. Take care, however, not to widen or
raise the line too far.
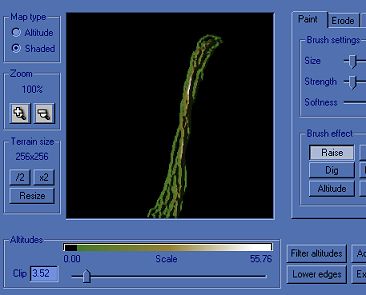
7 - When you're satisfied with the
drawing, use Diffuse once or twice, then raise the Clip level to remove all
unused portions of the terrain square and return to the main Vue
screens.
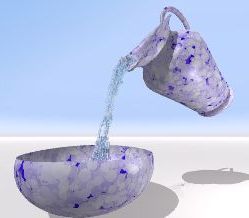
8 - Now set your "pour" object into
place (keeping the flat portion directed away from the camera). Apply a water
material to it. Add a couple more objects and render your pouring water.
|